Choose the question the model should answer
A site overview helps someone understand access, building positions and circulation. A building study may focus on height, setbacks and the relationship between volumes. A room or facade study asks for a closer look. Trying to give all three equal attention can create a large object without making any one decision easier.
Write a single sentence describing the conversation the model should support. Then mark the two or three things a viewer must recognise without explanation. Everything else can be considered for simplification, a separate drawing or a removable detail.
Also record the normal viewing position. A model viewed from standing height across a table has different presentation needs from a small object passed between two people. Allow space for viewers as well as the model itself.
Calculate the footprint before choosing the detail
At a scale of 1:N, divide each full-size dimension by N, keeping the units consistent. Convert metres to millimetres first if the model dimensions will be quoted in millimetres. Measure the entire scope being represented, including roads or landscaping that extend beyond the building.
| Scale | Model site footprint | A 150 mm full-size feature becomes |
|---|---|---|
| 1:100 | 600 × 400 mm | 1.5 mm |
| 1:200 | 300 × 200 mm | 0.75 mm |
| 1:500 | 120 × 80 mm | 0.3 mm |
The last column is arithmetic, not a statement that those features can be printed, finished or handled successfully. It reveals the next decision: whether a small feature needs physical representation at all. Confirm the proposed treatment after the geometry and manufacturing approach have been reviewed.
Make a short detail register
Sort details into three groups: essential to the explanation, useful context and optional decoration. Entrances may be essential to a circulation discussion, while individual window frames may add little to a site overview. The priority depends on the purpose, not on which elements happened to be present in the source file.
For each essential detail, choose an approach: reproduce it at scale, simplify it, represent it with colour or a label, or show it in a separate enlarged piece. If a feature is deliberately exaggerated for legibility, record that departure so nobody reads the model as a precise dimensional reference.
Agree the treatment of repetitive elements as a group. One approved facade approach can establish the appearance of repeated windows without requiring a separate argument about every opening. Keep the original design revision identifiable even when presentation geometry is simplified.
Use an existing model photograph to discuss the layout
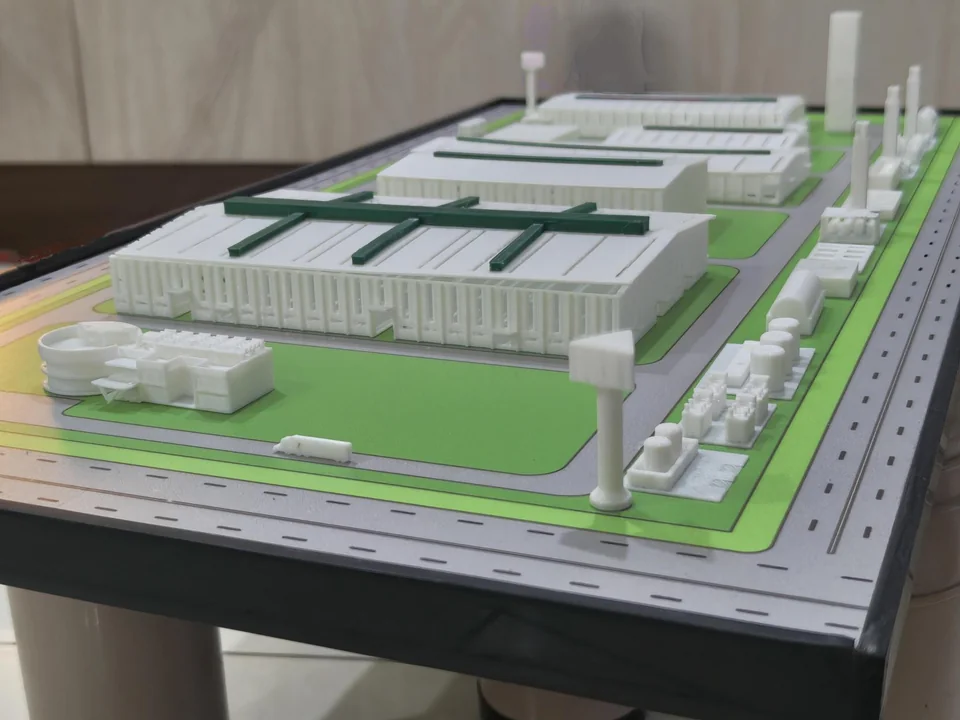
Bring a reference image into the brief with annotations. Point to the type of base, the relative prominence of buildings or the amount of surrounding context you want. “Like this photograph” is a starting point; the annotations explain which parts of that reference matter.
Keep the base and handover in the calculation
Add a planned border to the calculated footprint. A 300 × 200 mm site with a 25 mm border on every side becomes a 350 × 250 mm base. Labels outside that border, a cover or projecting components may increase the total envelope again. State each dimension separately so the display space and packing can be checked.
Decide whether the model is a single presentation piece or a set of removable parts. A lift-off roof needs a clear handling point and somewhere to rest. A model travelling between meetings needs a packing and unpacking plan. Read the splitting and joining guide when the proposed size calls for an assembly discussion.
Set a drawing-review checkpoint before printing and a presentation-review checkpoint before handover. Check orientation, labels, missing elements and the agreed design revision. These are separate from approving the final colour or visible finish.
Copy this scale and detail brief
Discuss the scope through architectural models, and use the finishing checklist to make the presentation requirements specific.